Monday, November 24, 2014

Dad's Spirit Pillow

Until now you have been reading the process I have used to create what I'm about to reveal today.  You read about the inspiration here, and the process of its creation here, here, and here.  Please indulge me a little more.  Here in its entirety is the rest of the poem that inspired my piece.

This song my friend, please understand
is from my heart, about my land.
My country young and great and wide,
two might oceans on its side,
And looking north, when clear the nights,
it's marked by our Northern Lights.
Where love and energy I give
with pride and pleasure, here to live,
in peace, in Canada, my land.
Please keep it that way, not to end.
I wish that it shall always be,
the country that it is for me.
A favour though, I'd like to ask
should you be charged a certain task.
When spirit moves to greater heights
my destination Northern Lights;
Just gather stems of wheat and hay
no matter what some people say,
Some twigs of cedar, birch and willow;
I'd like these for my spirit's pillow.
Then intertwine them, make a wreath, 
adorn it with a maple leaf;
Then place the same upon a hill
and know, my spirit is here still.
©   A.H.E. 

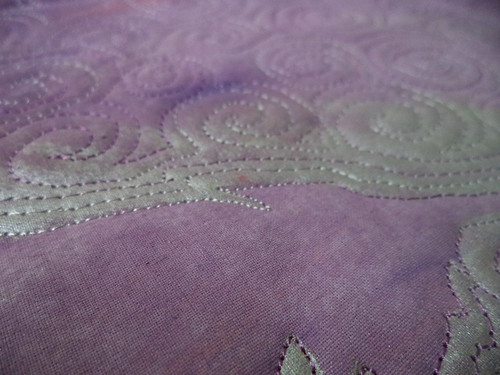
The final steps in the process included the addition of some thread stitched cedar boughs;


and of course some free motion quilting.


The process now being complete, here at long last is the end result.


I hope I did my inspiration justice.  Oh yes and thank you Vicki for this "theme", I'm getting better at documenting the PROCESS!

Garden 2014

The last steps of my process ...... after getting the basics together I had to decide how to finish the quilting. I chose a shiny black thread to outline the petals and then filled in with a gold metallic thread.
 Then how to finish the outer border..... I cut and placed fuzzy yarns which almost made the final cut...
 or how about adding a clay snake or worm? and do I add the black and white dotted fabric as binding or a yellow binding?
 No, I chose to face the quilt and keep it simple with the clay wiggle and four simple beads.
 I'm wondering if I added too much and should remove the clay pieces and go for even simpler. But for now it stays.
 Some close ups ... I did get some raw edges with the green strips as hoped for and I love the leaf prints in Lisa's sun-prints!
Thanks Vicki for another fun challenge!

Saturday, November 22, 2014

Step # ?


After deciding which of the laminated fabric pieces to use, it seemed that a little more interest need to be added. The most successful of these embellishment attempts was using an oil pastel crayon and rubbing over a piece of needlepoint canvas.


The next step was fusing the pieces to a background. Covering the area to be fused with parchment paper, kept the crayon and the polyester fabric from sticking to the iron.

Now quilting??

Friday, November 21, 2014

Getting on

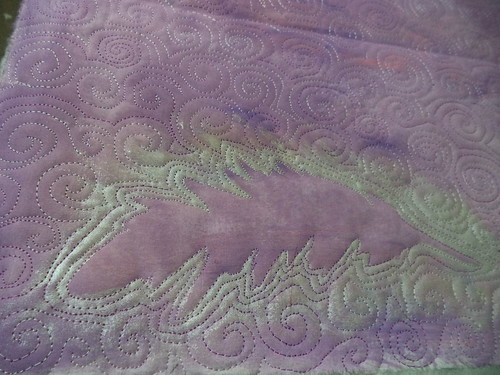
I have finished quilting the other pieces to my feathers!
But of course I forgot to photograph them.
The next step was to decide what to do with all the edges!
I have decided to bead them and so I needed to seal them
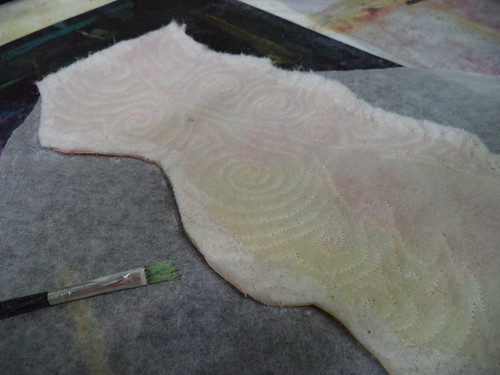
Here I am painting the contour cut edges with white glue.

I did both sides.  You can see here that I have not put any backing fabric on.  This is just one of my little foibles.  I always leave the backing off, and add it it after I have finished handstitching to cover up my threads.
Here are my pieces hanging up to dry.
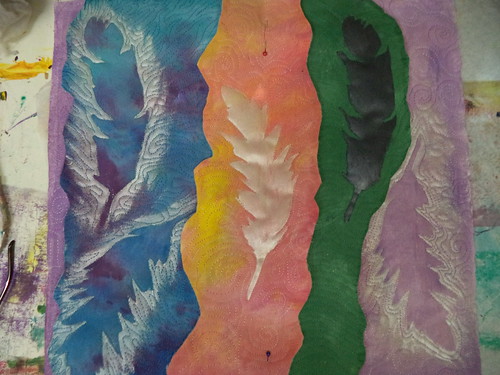
And the dried pieces arranged as they will be in the finished piece.
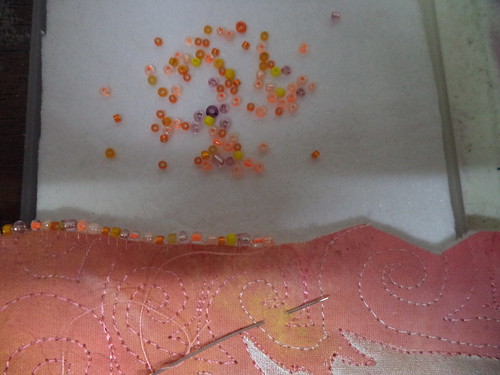
And here I am beading the edge of the centre piece.  I hope I will finish the beading in time!  Also, notice I am using a mix of beads.  I did not have enough of any particular colour to do the whole edge, so I have chosen a range of colours that are in the fabric.

Some final steps...

and my PROCESS piece will be ready for quilting.  I added some hand embroidery to represent wheat.

I want to add some dimensional work so I attempted to create cedar branches with stitchery.  I photocopied a branch I picked from a local cedar tree so that I had a sample of how the branch should look.

I free motioned the cedar boughs onto a wash away stabilizer called "Wash 'n Gone".

Now that three boughs are stitched, I need to wash away the stabilizer.  In order to keep the branches from becoming a jumbled mess of thread, I have had to pin each of the needles to a styrofoam board.  I used left over meat trays from the butcher.

I'll add some more embroidery after I see how the boughs look.  Whew! Almost there.

Thursday, November 20, 2014

Process Showing Progress

This week I moved along quickly with my Process.
 I laid out the fabrics I would start with and selected the threads that I thought would work best for the quilting. I decided to stitch my fabrics together onto my batting as I went and do some of the quilting as I went along, so chose a backing fabric and ironed it onto my batting. I'm using a polyester batting with glue on one side.
Playing with various options for the corners, thinking some black and white fabric would suggest the butterflies who visit the garden.
 Always thinking of adding some clay pieces....
 With no raw edges it didn't feel right as my garden is not nearly so perfect to suggest no raw edges so I decided to tear some strips of green fabric, twist it as I stitched it on and hope for some raw edges showing hap-haphazardly.

 I had some gold jump rings laying on my table so laid them in the center over the mad quilting I had done with variegated thread.
 I decided to leave that idea behind but may add some had stitching in metallic thread later.
Next is the gold metallic stitching through the petals...... and how to finish .... I'm feeling confident it will be ready for the 24th. Now back to the garden for more inspiration......

Sunday, November 16, 2014

A Never Ending Process

After seeing the results from my previous laminating experiences, I decided to try laminating images printed in only black and gray and black.

The black ink only image remained black.

The black and grays image became a paler black and the grays have a greenish tinge.
So back to more experimenting.

Progress Beyond the Sketchbook

Several weeks back I got out my machine and did some stitching with my friend Jackie. I was just randomly cutting and stitching, hoping to get inspired for my pocket quilt. Later I played with these two pieces but it didn't lead me anywhere but out to the garden. With the new reveal date I have renewed hope of revealing on time. So this week I made a few more sketches of ideas thinking that I needed to incorporate or refer to what has been one of my major time consumers in the past couple months. THE GARDEN seemed to surface. So instead of continuing with my pockets idea I switched to the garden. I also decided to incorporate photography as that is one of my passions when I'm out in the garden. So I found this on my shelf ..... I cut up some fabric and soaked it in the Bubble 200, ironed on some freezer paper, cut to size and ready to print.

I decided to alter a few photos in Photoshop and headed to the printer only to find it out of colored ink. So to the store ..... no ink for our old printer, too old and no time to wait for mail order so back to the store. New printer ....
 Only one of four test pages jammed so the printer is a keeper.
 I've chosen one photo of a Sand Dune Sun Flower... and I'll combine it with a sun-print of leaves from Lisa. I've been waiting for the perfect opportunity to use Lisa's fabric and this seems perfect, thanks Lisa!
 So I think I'm on a roll now.....


Thursday, November 13, 2014

Starting to stitch

I am just started on my stitching of the base of my piece.
Here is the bottom layer, stitched.  I am hoping to have time to do a little hand stitching and beading, but we will see.

Now I just have to rinse and repeat with the other layers.

Since four of us would like a bit more time and this is all supposed to be fun, Reveal date has been moved to the 24th.  Breathe.  You now have an extra 8 days!

Wednesday, November 12, 2014

Spirit pillow - progress and process

At my last post, I had designed several Celtic knot wreaths.  Next step in the PROCESS was to narrow it down to one of the designs.  This is the one I selected.

Fabric selection was next.  I found a black/white striped fabric that I thought could work for birch and a brown/tan stripe that may suffice for cedar.  I also wanted some background that might give the impression of being "high on a hill"; you know "airy like".  A Northcott Stonehenge worked beautifully.

After tracing the Celtic knot to the background fabric, I made some bias tape and have started attaching it to the traced pattern like this

and like this
The bias strips are now all attached.  Next will come the hand stitching (lots of it).  Something representing a willow needs to be added.  There are a few more items to add so I'd best get going.  November 24th will be here before I know it.


Tuesday, November 11, 2014

More Process- Beverly

I spent some more time with my piece this weekend.  It had been telling me that it wanted a pop of color- I thought of lime green, orange, or red- but Brigitte suggested giving orange a try, so I did!  I had a lovely piece of yellow-orange that I'd done as part of a gradation a few years ago, and it gave me just the pop I was hoping for. So, it is all pieced, sandwiched, and ready to quilt.


When I was looking at it on my table- it also told me something else.  I'd been assuming this was the orientation, but when I saw it upside-down- that just worked better.

 
So that's where I am.  I will have to scramble to get it quilted in time- at least I have a good idea of what I want to do.  And the Christmas soaping is done, so that won't be getting in the way.

Sunday, November 9, 2014

Time is Wasting

The actual process began today. It isn't as if nothing has been going on. The thermofax screen has been, prepared for use. The printing surface, plywood covered with 4 layers of old sheet and a bottom layer of felt is ready. The images for laminating have been printed.

polyester voile, images, thermofax screen, matte medium, padded print surface
applying matte medium to voile - images are underneath voile
heat setting to laminate the voile and the paper using parchment paper

soaking to soften paper for removal
Removing paper from back side of voile

the result

It appears that there is a whole lot more practice with the process which needs to happen before I have anything bordering on what I was expecting. Most of the colors on the printed image vanished, and the matte medium was not evenly distributed so some of the image did not adhere.  Back to square one.