Sunday, August 24, 2014

A ton of colour

Well, Ladies, what a wonderful colourful challenge!  I was blown away by all of your pieces.
As I told you in my email, I was unable to complete my challenge.  My mysterious illness still continues and at present the doctors have no idea what is the matter.  I am slowly improving, but the underlying problem is still present and returns now and then.
I thought you might like to see where I was going with my piece before my setback.
My intent was to quilt grass shapes at the bottom and clouds at the top and to couch the flower stems on the monoprint with the fibres.  I might have added some colours to the buds with some inktense, and some text somewhere.  Anyhow, that's where I got to.

I will leave it a week or so to post the next challenge!

Ladyslipper

and I'm done!  The minute I received the fabric and embellishments from Lisa, I knew exactly what I wanted to do, I just left it to last weekend to actually get started!

While on vacation in Ontario this spring, I took this picture.

ladyslipper

I enlarged the image so that it was full size, and then using a piece of clear vinyl and a wet erase marker, I traced my design, trying to simplify - I definitely need more work on that!!! You saw a bit of my map - 
and the mess I made in the process 

but what I didn't show was where I was going with it.  To be truthful, I really had my doubts - all those little pieces just didn't seem to be turning into my idea, but I persevered - after all, I had already cut up Lisa's gorgeous fabrics!  I kept placing pieces, not firmly fused yet, until finally, I thought "It's really not working" :(  I pinned it up to my design wall stepped back and took a picture - this picture.  When I saw it in my viewfinder I almost cheered!  It was working!  
I fused it down, layered it up with some stabilizer and started to thread paint.  and thread paint.  and thread paint.  There is a lot of thread on this.  I wanted to try and blend the colours a little better, and add some details.  I ended up with thread and inktense pencils to get the shading I was looking for.

Of course, once all the thread painting was done, I had to quilt to crap out of it!  Lots of dense straight line quilting on this one.
quilted

getting there

There were some embellishments included - so wonderful thread ends and some ribbons. When slipper orchids open, the the bud covering ends up as a twisted leaf like vine - I really don't know what to call it, but it looks cool!  I couched the threads and added the ribbon, and created my own version!
twisty vine

Of the three charms that Lisa included, one of them really spoke to me.  One day we were hiking a trail in Ontario and the path in front of us was just filled with little tiny frogs hopping across the trail to the lake on the other side. So many frogs we had to stop so we wouldn't step on them - the path was covered! The little frog had to be included!
little frog

All said and done, I am very pleased with my little wall hanging - its a perfect reminder of a great vacation, and our little group!

Ladyslipper
Ladyslipper

Thank you Lisa - I had a great time with this challenge - I just need to stop being such a procrastinator!

Musin' on Susan.....


A strange thing happened this summer....

Far from our vegetable garden...


a bunch of Black Eyed Susan flowers sprouted....


and I was fascinated with them...


how they grew...


what they looked like close up...


how they changed...


and the creatures who visited...


and so...

I tried to capture them in fabric, stitching, 

painted and melted tyvek, fiber,

French knots and a charm...


Unfortunately, getting this done with only minutes to spare
means that the light is no longer ideal for photographing!


And I have not yet decided whether I like 
the thread sketching on the petals

so I am still musin' on Susan!

No title, Just had Fun

I don't have a name for my quilt but I had fun making it! When I first saw Lisa's beautifully dyed fabric I thought it would be great in a Ricky Tim's Convergence quilt. I had made a couple of them a few years ago and have been wanting to make another for some time now. So I gathered other hand dyed fabrics that might work with Lisa's fabric. However as I hummed and haa'd I decided I would rather go with a crazy-like build as I go. However I couldn't get tear myself away from making a few sketches first.....
I started with creating a flap that would be the center-of-interest and where I planned to display the yarns and charms that Lisa included with our packets.....
 Then it was make a round, look, study, change, redraw and start the next round.....
 As I approached the 16" size I laid out several options for audition and took photos....


 I chose one and started quilting.......
 And finally came to the end with this.....

 And under the flap is the tissue paper that Lisa had wrapped our fabric and goodies in.....
 Thanks Lisa for a fun challenge!!!! And for all your work in preparing and getting supplies to us!


Color Study- Beverly


Color Study- 16 X 16
Hand dyed cotton, applique, machine quilted

I spent several weeks looking at Lisa's lovely fabric on my design wall, trying to decide what to do with it.  The movement of the colors was so lovely, I finally went with a color study- snazzy title, right?  I wanted to see what would happen if the darker colors were larger shapes, and if the bright yellows would still dominate the piece, even though they are much tinier.  And I knew I wanted to do it against a black background.  I love how black makes colors pop.

I quilted the background first- I had the perfect variegated thread.  Then I started played with the placement of the squares.  The final arrangement was a collaboration between me and my son.  They are fused onto the background, using Terry Grant's method of fusing just on the edge of the fabric with Liquifuse.

I spent another couple of weeks debating how to quilt the squares.  I started with an abstract design, and ripped it out after just a little bit.  I ended up with these free form, kind of fern-y things.  The entire time I was quilting them, I was thinking about Janet and her gorgeous feathers, and how mine were just a pale imitation.  Sigh!!  I drew out the first one, then freehanded the others- and I like the free hand ones best.


Lisa, I really struggled with the embellishments.  My work is going so far in the opposite direction, I wasn't sure what to do with them.  I ended up placing the leaf charm between a gold and green square, kind of a reference to the changing of the leaves that we'll be experiencing soon.

I had fun with this, learned some tricks for quilting (how to get evenly spaced rays on a square), and was inspired enough by Lisa's fabric that I spent an entire weekend dyeing fabric in color gradations- my last blog post has pictures of those.  So, thank you Lisa for a great challenge, and the materials to pull it off!

Sunshine and Shadow

Lisa's challenge was delightful and frightening at the same time. The embellishments and the color of the lovely hand dyed fabric she sent meant I needed a while to come up with a plan of attack. I still wanted to play around with the Kuba design concept Faith Ringgold had pursued in some of her work, so I began looking through my stash to see if I had some fabric that would work with the fabric Lisa sent.

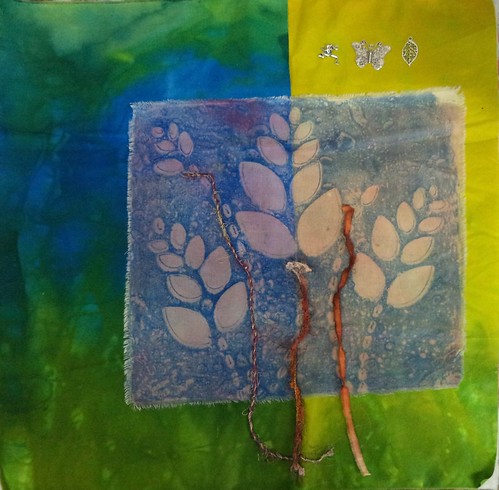
After selecting a colorful batik fabric, I decided that I really wanted to have some pattern on the solid  fabric which lead to purchasing Shiva paintstiks, some stencils and experimenting. I was not overly enthusiastic with the results.

The triangles, which would make up the rectangles, when sewn together, were already cut and before sewing the triangles together, it seemed wise to decide on the layout. By now I could tell that following through with the Kuba design was not going to work as I had anticipated.

The next idea was to sew the arrangement shown below. This presented a problem. At the edges of the rows, the triangles were turned 90 degrees and when sewn, would have to be inset. I struggled with inset triangles several years ago and knew that this was not the path I was going to take.


After sewing the triangles into rectangles, I discovered that I did not have as many layout options as I had anticipated. My first inclination was a modified color wash. I substituted some hand dyed blue for the boldest yellows and the darkest greens.


Thank goodness, for digital photography! I took a photo of the quilt layout and then proceeded to rearrange blocks until I came up with a design that was more satisfying.

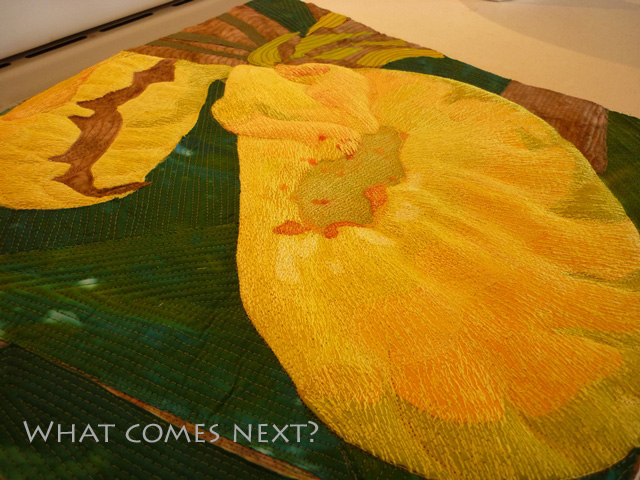
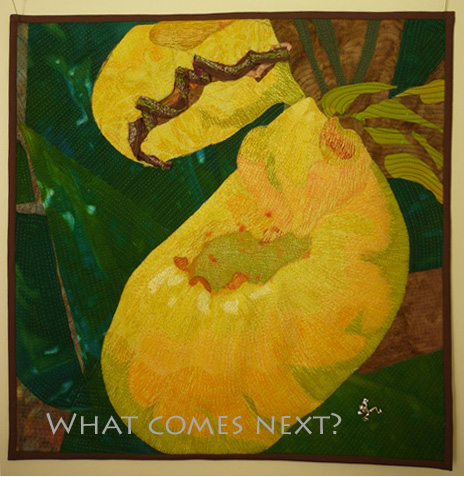
If you squint and use your imagination, you may be able to visualize streams of light flooding from right to left across the quilt, "sunshine and shadow".

Sunshine and Shadow
26" x 27"
2014
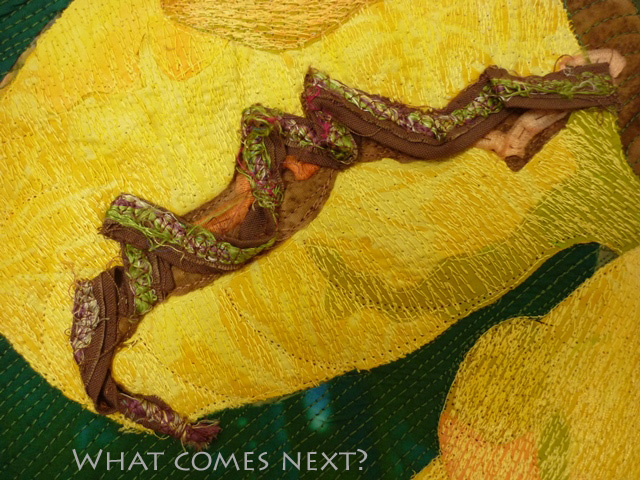
This project falls short of the challenge in several respects. It turned out to be "quilty" instead of  "fiber arty" and at this point, adding the embellishments would make them feel tacked on rather than integrated into the design of the piece. Perhaps I felt intimidated by the use of embellishments and didn't even bother to pursue a method for their use. See the leftovers and the paintstik experiments below.


Charms, Feathers, Mardi Gras!

Thank you Lisa!  I’ll admit that this one was indeed a challenge.  It had me stumped for the longest time. I mulled it over, sketched ideas, set it aside, and cogitated further.  What do you do with all of this?

At last!  One week prior to reveal day I had my idea.  It would need cutting, fusing, and embellishing.  Yup!  I took your beautiful hand dyed fabric pressed it to Misty Fuse and slashed it apart.  It looked like this when I was done.

Next I chose fabric that would act as a canvas for my idea.  Using a stencil and some Shiva paint sticks, I created a border.

A few more pieces had to be cut; some of them fussy.

Now it was a matter of arranging all of the pieces, fusing them to the background and doing some FMQ stitching to hold things in place.

With everything now “stuck” in place there was no turning back.  Embellishing was the next order of business and your charms and fibers fit in perfectly.  I added some additional items, some hand embroidery and some fancy machine stitchery.  You can hop over to my blog and see more process pictures.

So what do you think?  Does this remind you of Mardi Gras?  

Thursday, August 21, 2014

what have I got myself into?

I have a plan.  It involves this

which lead to this

and a whole lot more like it.

I am making progress, I will have a reveal, but I can't say it will 100% done!

Looking forward to seeing everyone's art on Sunday!

Cheers!
Janet