
Showing posts with label process. Show all posts
Showing posts with label process. Show all posts
Sunday, January 4, 2015
Process - Challenge 15
On September 4 Vicki's challenge for the group was to show our process. The blog for the next several months showed posts by members of their inspiration, designs and creative processes. Click on the Challenge 15 tab above to view the results of our Process challenge.
Monday, November 24, 2014
The End of the Process
The process of laminating fabric as developed by Claire Benn, has a bigger learning curve than I anticipated. I purchased her book, Paper & Metal Leaf Lamination, read it, watched the DVD and thought about the process. She recommends printing the papers to be laminated at least a week before the lamination process is begun which I did not strictly adhere to and I believe this is one factor that affected the lack of stronger colors in my fabric.


The collage above shows the photographs I began with. The two on the left and the black and white photo were photos of iris manipulated with a kaleidoscope filter in Photoshop. The brown photo was pine leaves, also manipulated.
The final process, after rubbing with oil pastel colors to create texture and fusing the pieces to a white sheet, was minimal quilting. No batting was used. The quilting design was based on the diagonal lines in the black and white photo above.The borders were sew on after quilting and the last step was to adhere the completed piece to a gallery wrapped canvas.
I am not sure I will try this process again. It was very labor intensive and probably takes months to perfect the technique. The outcome is different than what I anticipated. It is definitely one of a kind. I still have no come up with a title, so give me some suggestions.
The feather process
So I got there in the end! After my last round failure, I thought a lot about my philosophy of creating and how we need to give ourselves permission to fail and to think of it as a positive, learning process. As well, I believe fully that creating is about the process, not the product. Producing an end item is good, if it happens, but it is the process that I wish to enjoy. If I don't, then really, is it worth while? Creativity is, for me supposed to be a fun, happy process.
Well, for my process, I have posted

Well, for my process, I have posted
and here
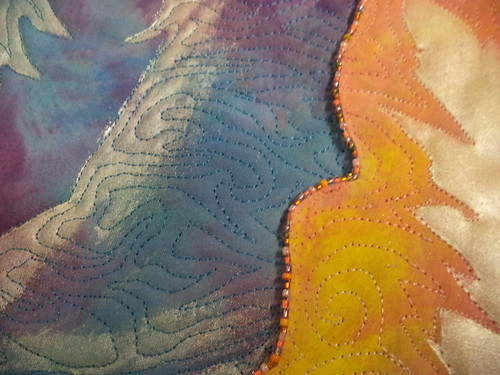
The last step has been the beaded edges of the layered mini quilts
I love how the beading (which was endless, so lucky I enjoyed it) emphasises the dimensionality of the layers.
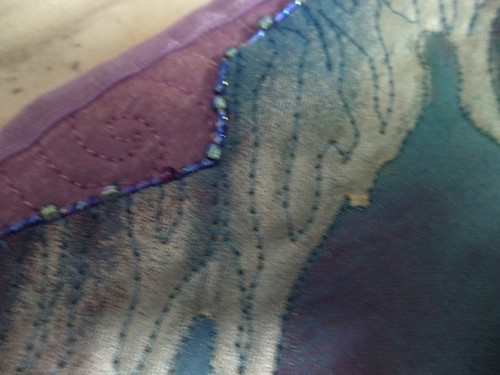
Here (Sorry about the blur) you can see I didn't bead the outer edge, but bound it with organza ribbon. There is a limit to my persistence!
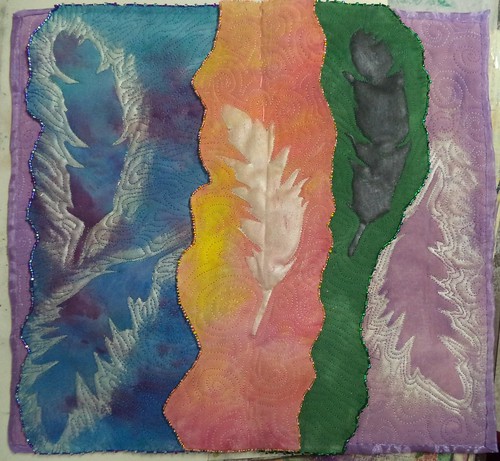
And here is my finished piece. Because it was based on a spread in my sketchbook, I just used some large stitches in the centre to 'bind' it like a book. I did not however stitch through the centre feather. I thought that might detract from the focus.
Garden 2014
The last steps of my process ...... after getting the basics together I had to decide how to finish the quilting. I chose a shiny black thread to outline the petals and then filled in with a gold metallic thread.
.jpg)
.jpg)
.jpg)
.jpg)
.jpg)
.jpg)
Saturday, November 22, 2014
Step # ?

After deciding which of the laminated fabric pieces to use, it seemed that a little more interest need to be added. The most successful of these embellishment attempts was using an oil pastel crayon and rubbing over a piece of needlepoint canvas.

The next step was fusing the pieces to a background. Covering the area to be fused with parchment paper, kept the crayon and the polyester fabric from sticking to the iron.
Now quilting??
Friday, November 21, 2014
Getting on
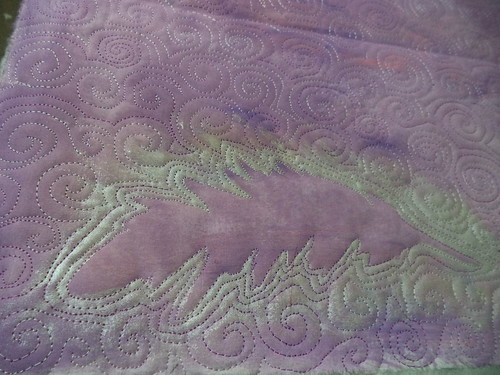
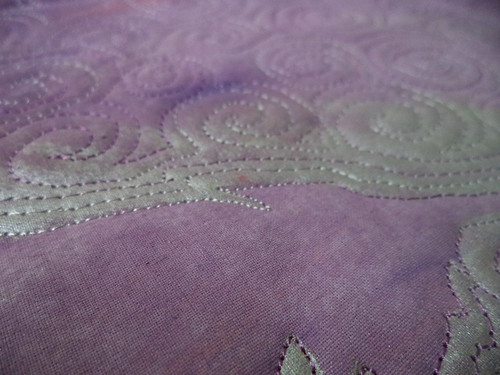
I have finished quilting the other pieces to my feathers!
But of course I forgot to photograph them.
The next step was to decide what to do with all the edges!
I have decided to bead them and so I needed to seal them
 Here I am painting the contour cut edges with white glue.
 I did both sides. You can see here that I have not put any backing fabric on. This is just one of my little foibles. I always leave the backing off, and add it it after I have finished handstitching to cover up my threads.
 Here are my pieces hanging up to dry.
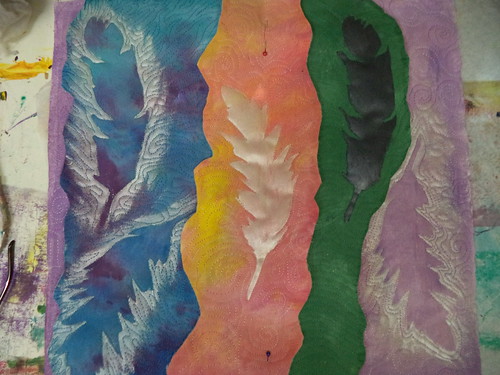 And the dried pieces arranged as they will be in the finished piece.
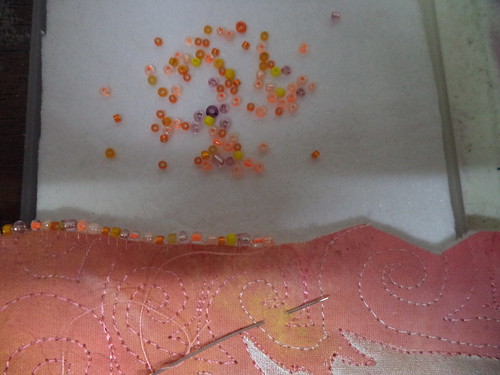 And here I am beading the edge of the centre piece. I hope I will finish the beading in time! Also, notice I am using a mix of beads. I did not have enough of any particular colour to do the whole edge, so I have chosen a range of colours that are in the fabric.
But of course I forgot to photograph them.
The next step was to decide what to do with all the edges!
I have decided to bead them and so I needed to seal them
Thursday, November 20, 2014
Process Showing Progress
This week I moved along quickly with my Process.
.jpg) I laid out the fabrics I would start with and selected the threads that I thought would work best for the quilting. I decided to stitch my fabrics together onto my batting as I went and do some of the quilting as I went along, so chose a backing fabric and ironed it onto my batting. I'm using a polyester batting with glue on one side.
I laid out the fabrics I would start with and selected the threads that I thought would work best for the quilting. I decided to stitch my fabrics together onto my batting as I went and do some of the quilting as I went along, so chose a backing fabric and ironed it onto my batting. I'm using a polyester batting with glue on one side.
.jpg) Playing with various options for the corners, thinking some black and white fabric would suggest the butterflies who visit the garden.
Playing with various options for the corners, thinking some black and white fabric would suggest the butterflies who visit the garden.
.jpg) Always thinking of adding some clay pieces....
Always thinking of adding some clay pieces....
.jpg) With no raw edges it didn't feel right as my garden is not nearly so perfect to suggest no raw edges so I decided to tear some strips of green fabric, twist it as I stitched it on and hope for some raw edges showing hap-haphazardly.
With no raw edges it didn't feel right as my garden is not nearly so perfect to suggest no raw edges so I decided to tear some strips of green fabric, twist it as I stitched it on and hope for some raw edges showing hap-haphazardly.
.jpg)
.jpg) I had some gold jump rings laying on my table so laid them in the center over the mad quilting I had done with variegated thread.
I had some gold jump rings laying on my table so laid them in the center over the mad quilting I had done with variegated thread.
.jpg) I decided to leave that idea behind but may add some had stitching in metallic thread later.
I decided to leave that idea behind but may add some had stitching in metallic thread later.
.jpg) Next is the gold metallic stitching through the petals...... and how to finish .... I'm feeling confident it will be ready for the 24th. Now back to the garden for more inspiration......
Next is the gold metallic stitching through the petals...... and how to finish .... I'm feeling confident it will be ready for the 24th. Now back to the garden for more inspiration......
Sunday, November 16, 2014
A Never Ending Process
After seeing the results from my previous laminating experiences, I decided to try laminating images printed in only black and gray and black.
 |
| The black ink only image remained black. |
 |
| The black and grays image became a paler black and the grays have a greenish tinge.
So back to more experimenting.
|
Progress Beyond the Sketchbook
+(2)+(626x492).jpg) Several weeks back I got out my machine and did some stitching with my friend Jackie. I was just randomly cutting and stitching, hoping to get inspired for my pocket quilt. Later I played with these two pieces but it didn't lead me anywhere but out to the garden. With the new reveal date I have renewed hope of revealing on time. So this week I made a few more sketches of ideas thinking that I needed to incorporate or refer to what has been one of my major time consumers in the past couple months. THE GARDEN seemed to surface. So instead of continuing with my pockets idea I switched to the garden. I also decided to incorporate photography as that is one of my passions when I'm out in the garden. So I found this on my shelf ..... I cut up some fabric and soaked it in the Bubble 200, ironed on some freezer paper, cut to size and ready to print.
Several weeks back I got out my machine and did some stitching with my friend Jackie. I was just randomly cutting and stitching, hoping to get inspired for my pocket quilt. Later I played with these two pieces but it didn't lead me anywhere but out to the garden. With the new reveal date I have renewed hope of revealing on time. So this week I made a few more sketches of ideas thinking that I needed to incorporate or refer to what has been one of my major time consumers in the past couple months. THE GARDEN seemed to surface. So instead of continuing with my pockets idea I switched to the garden. I also decided to incorporate photography as that is one of my passions when I'm out in the garden. So I found this on my shelf ..... I cut up some fabric and soaked it in the Bubble 200, ironed on some freezer paper, cut to size and ready to print..jpg)
I decided to alter a few photos in Photoshop and headed to the printer only to find it out of colored ink. So to the store ..... no ink for our old printer, too old and no time to wait for mail order so back to the store. New printer ....
.jpg)
.jpg)
.jpg)
Thursday, November 13, 2014
Starting to stitch
I am just started on my stitching of the base of my piece.
 Here is the bottom layer, stitched. I am hoping to have time to do a little hand stitching and beading, but we will see.

Now I just have to rinse and repeat with the other layers.
Since four of us would like a bit more time and this is all supposed to be fun, Reveal date has been moved to the 24th. Breathe. You now have an extra 8 days!
Wednesday, November 12, 2014
Spirit pillow - progress and process
At my last post, I had designed several Celtic knot wreaths. Next step in the PROCESS was to narrow it down to one of the designs. This is the one I selected.


Fabric selection was next. I found a black/white striped fabric that I thought could work for birch and a brown/tan stripe that may suffice for cedar. I also wanted some background that might give the impression of being "high on a hill"; you know "airy like". A Northcott Stonehenge worked beautifully.
After tracing the Celtic knot to the background fabric, I made some bias tape and have started attaching it to the traced pattern like this


After tracing the Celtic knot to the background fabric, I made some bias tape and have started attaching it to the traced pattern like this

and like this

The bias strips are now all attached. Next will come the hand stitching (lots of it). Something representing a willow needs to be added. There are a few more items to add so I'd best get going. November 24th will be here before I know it.
Tuesday, November 11, 2014
More Process- Beverly
I spent some more time with my piece this weekend. It had been telling me that it wanted a pop of color- I thought of lime green, orange, or red- but Brigitte suggested giving orange a try, so I did! I had a lovely piece of yellow-orange that I'd done as part of a gradation a few years ago, and it gave me just the pop I was hoping for. So, it is all pieced, sandwiched, and ready to quilt.

 So that's where I am. I will have to scramble to get it quilted in time- at least I have a good idea of what I want to do. And the Christmas soaping is done, so that won't be getting in the way.

When I was looking at it on my table- it also told me something else. I'd been assuming this was the orientation, but when I saw it upside-down- that just worked better.

Sunday, November 9, 2014
Time is Wasting
The actual process began today. It isn't as if nothing has been going on. The thermofax screen has been, prepared for use. The printing surface, plywood covered with 4 layers of old sheet and a bottom layer of felt is ready. The images for laminating have been printed.
 |
| polyester voile, images, thermofax screen, matte medium, padded print surface |
 |
| applying matte medium to voile - images are underneath voile |
 |
| heat setting to laminate the voile and the paper using parchment paper |
 |
| soaking to soften paper for removal |
 |
| Removing paper from back side of voile |
 |
| the result
It appears that there is a whole lot more practice with the process which needs to happen before I have anything bordering on what I was expecting. Most of the colors on the printed image vanished, and the matte medium was not evenly distributed so some of the image did not adhere. Back to square one.
|
Saturday, November 8, 2014
..and then wait 72 hours.
So today, I painted my Fabric for my piece.
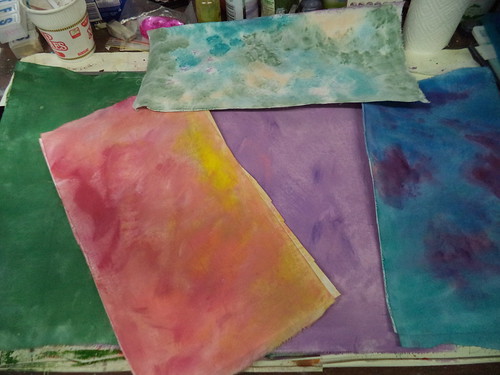 I used acrylic, simply because it was easier. I intend to do a lot of free motion embroidery and the stiffness helps with that. The piece at the top was an extra piece that I put all the leftover paint on.
When they dried, which was not long as it was very hot today, I stencilled the feathers.
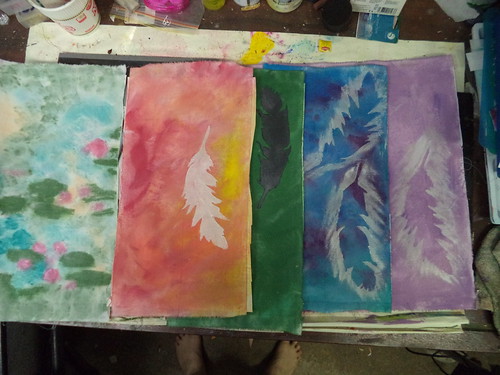 I used shiva sticks to do the stencilling, although I could have just used paint. The one on the left was my scrap piece and I thought it looked a bit like monet's waterlilies, so I added a bit of paintstick to make it look more like it!
And now. Wait 72 hours. I put quite a bit on, so although stencilled images can dry quicker, I will wait the whole time, 'till tuesday, just to be sure. and then I'll be doing a lot of stitching between then and the due date.
When they dried, which was not long as it was very hot today, I stencilled the feathers.
And now. Wait 72 hours. I put quite a bit on, so although stencilled images can dry quicker, I will wait the whole time, 'till tuesday, just to be sure. and then I'll be doing a lot of stitching between then and the due date.
Subscribe to:
Posts (Atom)